

 03.13
03.13
 SIOS
SIOS

Cara membuat kotak Admin Blog
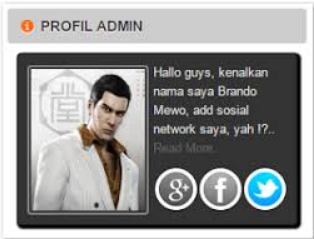 Cara membuat widget author box #kotak admin blog. Pada kesempatan kali ini saya akan mencoba membagi pengetahuan tenatang cara membuat profil mengenai penulis blog, walau pun sebenarnya Blogger telah menyediakan widget untuk pembuatan profil default pada blog.
Semoga widget yang akan kita buat ini dapat menambah daya tarik terhadap blog yang telah kita disain
1. Login ke akun blog anda2. Pada halaman dashboard, masuk kebagian Tata Letak
3. Klik tambah gadget diposisi widget About The Author Box ini ingin dipasang
4. Pilih HTML dan masukkan kode berikut :
<div class=kotak>
<div id=myprofile>
<img id="profile" src="https://blogger.googleusercontent.com/img/b/R29vZ2xl/AVvXsEi0xn5mNVQgEK-H6_NeJPWqd0d5LeI59xjy6_6XzuDUWNtna2Kxuw7jHh3co27gOS-OKytF4frfv6OJcAnjk6rHZdEYEs2ACpcQ9selOvyywlLszWXH9D-DJwyh65vQPIpKOB1nIS_PHxA/s320/brando-m.PNG" align="left"/> Hallo guys, kenalkan nama saya Brando Mewo, add sosial network saya, yah !?..<br/> <a style="color:#666;" href="http://www.seocips.com" rel='nofollow' target='_blank'> Read More..</a><br/>
<div class='touchme'><!--Google Plus--> <a class='googleplus' href="https://plus.google.com/u/0/103662134309614692674" rel='external nofollow' target='_blank'></a> <!--Facebook--> <a class='facebook' href="https://www.facebook.com/seocips" rel='external nofollow' target='_blank'></a> <!-- Twitter --> <a class='twitter' href="https://twitter.com/seocips" rel='external nofollow' target='_blank' ></a>
</div></div></div>
<style>
#myprofile{border:1px solid #ddd; margin:0;padding:10px; overflow:hidden;background:#333;border:1px solid #1e1e1e;border-radius:4px;color:#ddd;box-shadow: 2px 2px 2px 2px #000; }
#profile{ border:2px solid #888; margin:2px 5px 0px 0px;padding:2px;text-align:justify;height:150px;width: 120px;border-radius:4px;} #profile:hover { border:2px solid #ccc;cursor:pointer;text-align:justify; }
.opacity:hover { -moz-box-shadow: 1px 1px 4px #000; -webkit-box-shadow: 1px 1px 4px #000; box-shadow: 1px 1px 4px #000; }
.touchme a { display:block;height:50px;width:37px;padding:0 5px;margin-top:10px; float:left;background:transparent url(https://blogger.googleusercontent.com/img/b/R29vZ2xl/AVvXsEhOesPjYjaup02rDYSfhSnHqgQwYwUpfqzasmB5ox9yNPAYGQldfZnmd0v4Ep7e8F6CBWB3jepjkmkRr1HpFKs8YE2FkkZj0zn12xNSx9oDM3WfIWLstv5lhhzF8Cud_Vx6K1Akt3oU2_M/s1600/Sharing+Touch+Me.png) no-repeat;} .touchme a.googleplus { background-position: 0px -58px; } .touchme a.googleplus:hover { background-position: 0px 0px; } .touchme a.twitter { background-position: 0px -290px; } .touchme a.twitter:hover { background-position: 0px -232px; } .touchme a.facebook { background-position: 0px -406px; } .touchme a.facebook:hover { background-position: 0px -348px; }
</style>
5. Save dan lihatlah hasilnya.
 Posted in: trik dan tips it
 Assalamualaikum,

0 komentar:
Posting Komentar